

Lightroom Classic 13 Released
Yesterday, as part of its Max event, Adobe released a new version of the Lightroom family. This includes Lightroom Desktop 7.0, the latest versions of Lightroom mobile and Lightroom Classic 13. In this post, We’ll have a look at some of the key features of Lightroom Classic 13.
HDR Display and Editing
The first of the headline features is that Lightroom now lets you work in high dynamic range. This is not to be confused with the previous HDR function of merging multiple images, (although that works with this too). Instead, the new function allows you to work with images in an HDR colour space and display them correctly on an HDR supported display. When you work in HDR mode, you are working with a considerably expanded range. You can activate this from a single RAW file or from merged.

You can also export in an HDR compatible format, although strangely this doesn’t support exporting of HDR HIEF images. The tools also let you create an SDR version from the HDR source, with options on how to adjust the SDR exposure separately. When using curves in HDR mode, you’ll also see a different HDR curves tool.

I’m not sure who this will primarily benefit, as it seems mostly geared at displaying images and working with video. It should be noted though that some newer cameras do support shooting to HDR compatible formats, and this will allow those to be displayed properly.
I don’t know if there’s any benefit to someone who wants to print out photos.
I would love to give you a proper demonstration, but unfortunately, I don’t have a proper HDR display at the moment. I will, however, cover this in more detail in a future post, and I'll get access to an HDR display to test this fully.
AI-based depth blur
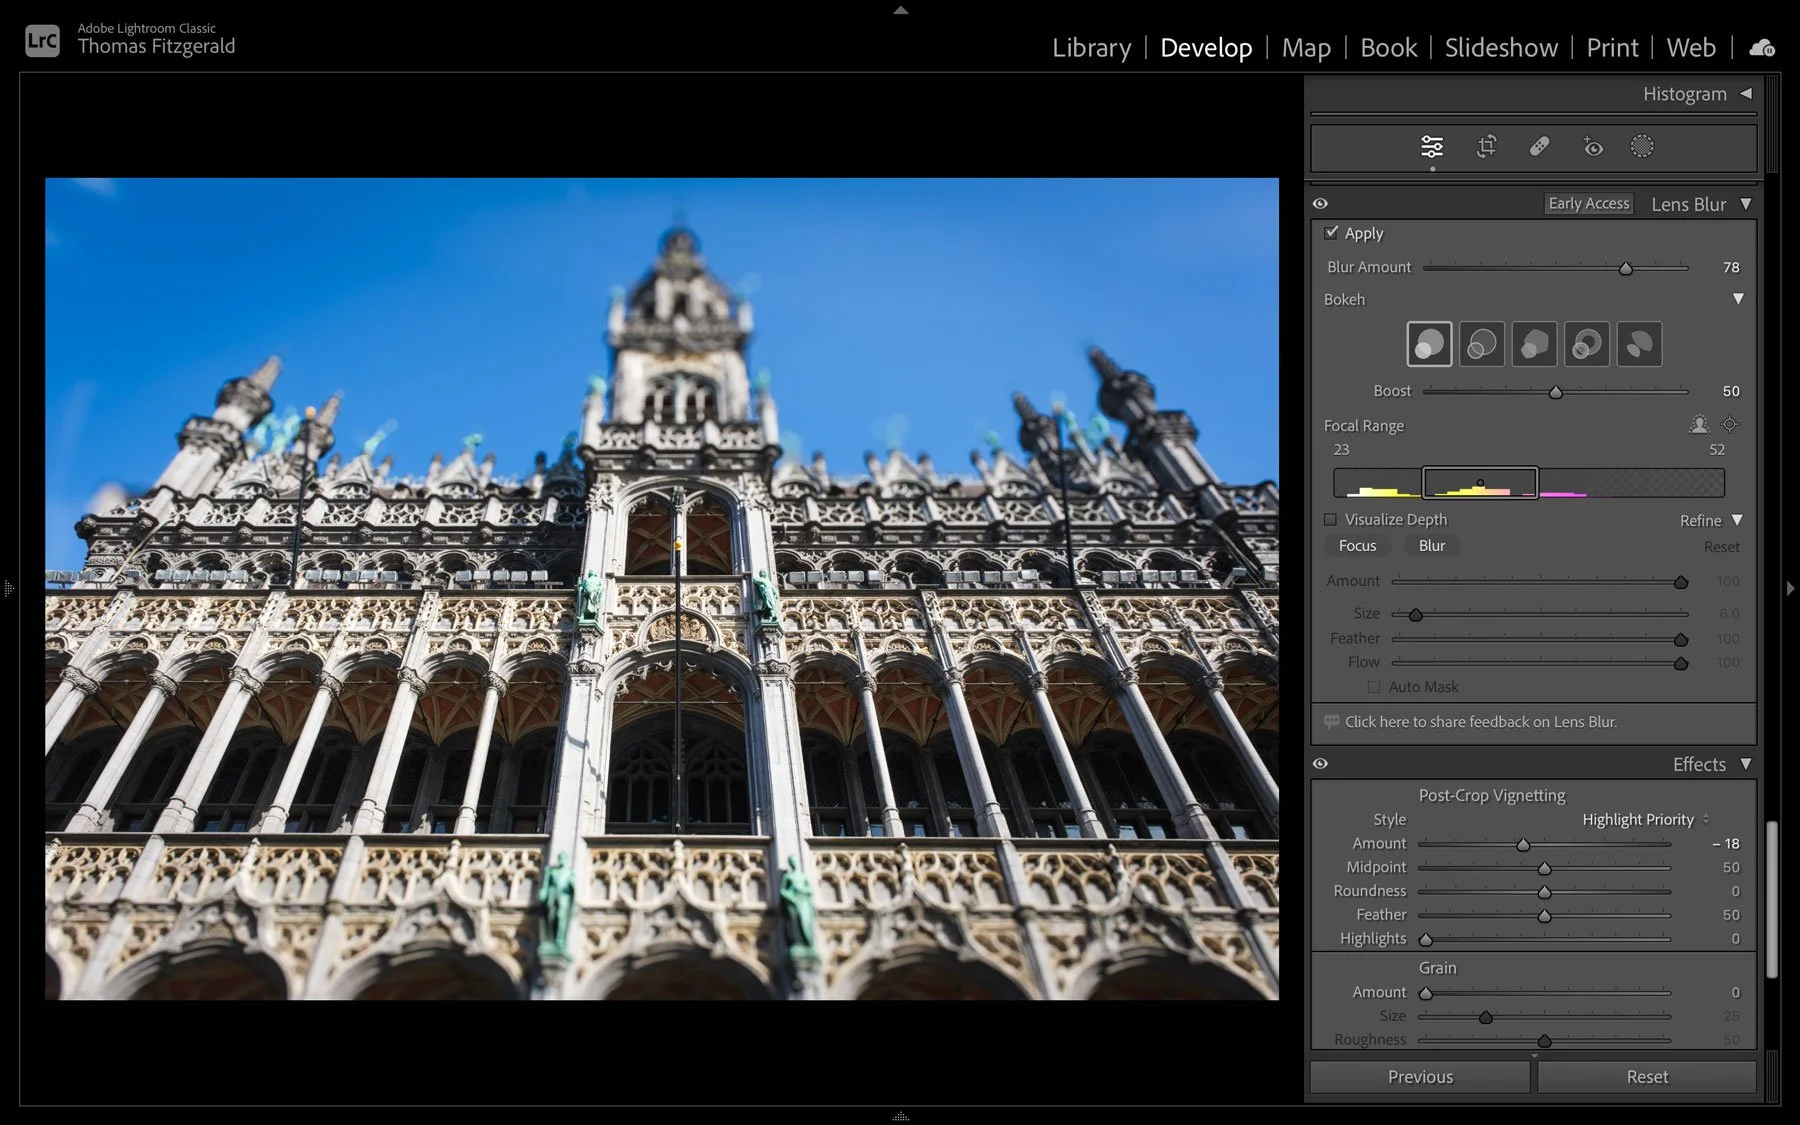
The second new feature is the ability to create an AI-based depth map for your image, and blur based on that depth map. In other words, you can use AI to create artificial depth blur or fake depth of field. It should be noted that this feature is labelled as “Early Access”.
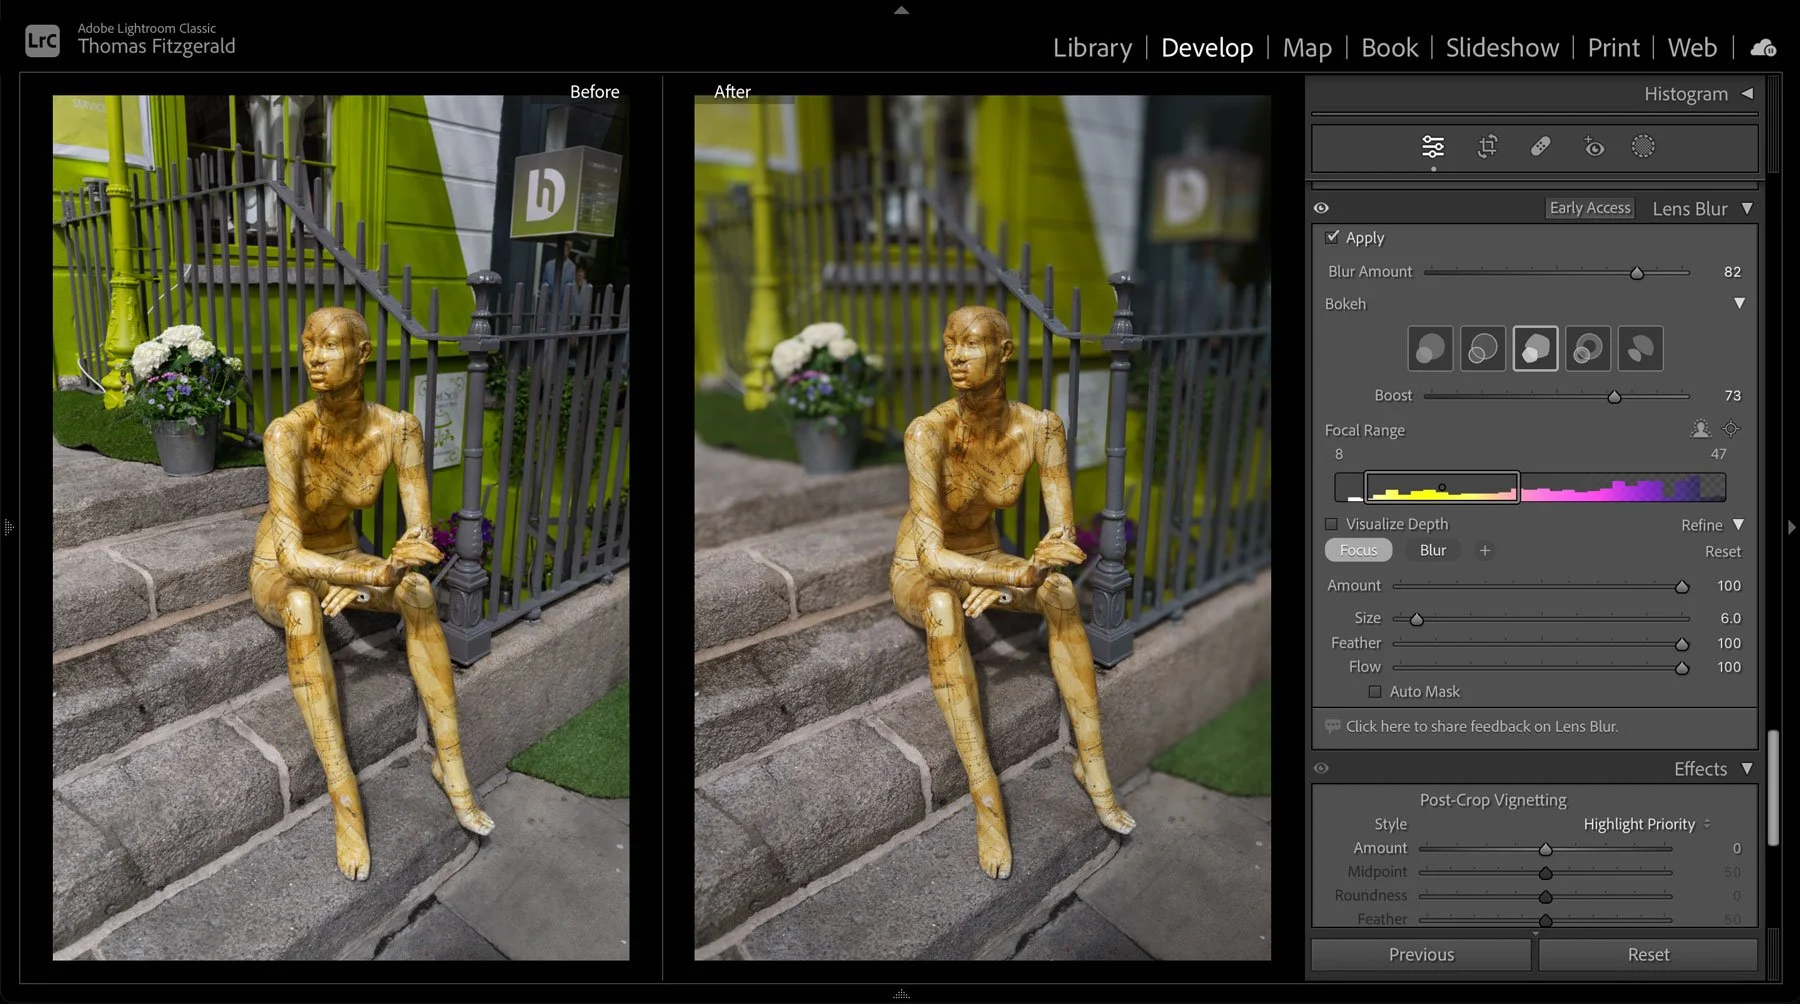
This is actually pretty cool. You could previously do this with Photoshop’s neural filters, but the functionality in Lightroom is much more advanced.
In the panel, you get a visualisation of the depth and a slider to control the area in focus. You can also brush in or out areas of focus if the depth map is incorrect. You can also control the shape and look of the bokeh. This will also work with images that have an embedded depth map, such as photos from an iPhone.
I’ve tested this feature out using a pre-release version of the software, and it’s pretty cool when it works, although there are times the depth map isn’t perfect. It’s quite useful for simulating larger image sensors. For example, if you shot something on say micro four thirds or a 1-inch sensor, and wanted to give it a greater depth of field, this in theory allows you to do this. It’s also pretty good at making faux tilt shift images given the right perspective!
Point Colour
The third major new feature is called “Point Colour”. This resides in the colour Mixer panel as a new tab. Unlike the traditional colour mixer, which is based on a fixed set of colours, point colour allows you to add multiple samples and select a distinct colour to edit. Capture One has had a similar feature for a long time, and it allows you to do very precise colour editing without going to Photoshop.

In the Point Colour tab, you get an eyedropper colour picker that lets you select a colour by picking it directly from the image. Once selected, you then get a set of controls. There is a large palette where you there is a circle over the point. You can drag this to set the destination colour for the remapping. Underneath this, you have a series of sliders for directly controlling the colour, as well as a range slider for determining how close to the selected colour the range that is edited.
Conclusion and other notes
That’s all the key features in this release, but there are some other minor improvements, such as bug fixes and performance improvements. As mentioned in the introduction, there have also been some improvements in the other version of Lightroom, such as the ability to edit images from local folders in Lightroom Desktop. I had hoped to have more content prepared for the launch, but I’ve been travelling, so I only have a summary for now, but I will try to create post some overview and tutorial videos next week.
Help Support the Blog
Check out my eBooks and Presets
Check out my photography eBooks , Capture One Styles and Lightroom Presets available on GumRoad.
Subscribe to my YouTube Channel
Check out my YouTube channel for tutorials, Vlogs, and more!
Buy me a coffee!
If you want to say thanks or help, then you can feed my caffeine habit and buy me a coffee via PayPal with a one off donation to my PayPal tip jar. (Please note that PayPal doesn’t make it easy to respond to these so just know you are thanked in advance)
Join our Facebook Group
If you want to discuss anything you’ve read here on my website, or saw on my youtube channel, or if you want to share images you’ve created using any of my techniques or presets, then I’ve started a Facebook Group just for that.
Note that this post contains paid affiliate links. We get a small commission for purchases made through these links, which helps run this site.


