Using Photo Ninja as a Plug-in with Lightroom
Lately I've been writing a lot about using Photo Ninja in conjunction with Lightroom for processing files from Fuji's X-Trans sensors. I've been promising to write about the workflow for using Photo Ninja with Lightroom for some time, so here it is, finally!
One of the cool features of Photo Ninja is the ability to set it up so that it works as a plug-in with Lightroom. What's particularly clever about the approach used, is that Photo Ninja uses the standard Lightroom External editor set up which normally only works with Tiffs or PSDs. Photo Ninja will find a matching raw file when sent an image from Lightroom and open that instead. When you save a tiff back out, it writes back over the Tiff that you sent from Lightroom maintaining the link and keeping you from having to manually re-import files.
Setup
To set this up and use it is quite simple. First of all you need to add Photo Ninja as an external editor in Lightroom. Here's what to do:
- Go To the Preferences in the Lightroom Menu (on a Mac, Edit menu on a PC)
- Select External Editing
- Under the "Additional External Editor Section", use the Choose Button to set your application, and select Photo Ninja from your Applications folder
- Set File format to Tiff
- Set Colour Space to Pro Photo RGB
- Set Bit Depth to 16bit (You can set it to 8bit if you want, but it doesn't really matter as you'll be overwriting this file anyway)
- I have left resolution set to 240 and compression set to Zip but you can set these how you choose
- Tick "Stack with original"
- Once you've done this you need to save this as a preset by selecting "save current settings as new preset" from the preset popup menu, give it a name (I suggest "Photo Ninja").
- That's it, you're done in Lightroom

Once you've set Lightroom up you need to make a few changes in Photo Ninja. Launch the application and then do the following:
- From the "Photo Ninja" menu choose preferences (On a mac it's the menu inside the application frame, not the one in the menubar)
- Select the file Handling tab
- Set the following options
Once you do this, Photo Ninja will now attempt to load a matching raw file whenever you send it a Tiff (or a jpeg). When you write it back out, it will overwrite the one that Lightroom generated, so Lightroom will think it's working just like any other external editor that only works with tiffs.
Now that you have everything set up, to edit an image in Photo Ninja from Lightroom, do the following
- Start by selecting an image in Lightroom that you want to edit, and right click and choose Edit In >Photo Ninja (or whatever you called your template earlier)
- This will save out a Tiff and send it to Photo Ninja, where if everything is set up correctly, it will load the matching raw file instead.
- Make your edits in Photo Ninja.
- Once you're finished you need to save it to send it back. There is a specific way to do this, and it's important that you use the right button. It's the "Quick Render" button, and it's the first button under the row of buttons under the list of Adjustments.

Before you save for the first time, you need to configure your settings, so that you're saving in the right format. To do this control click (or right click) on the button to bring up the options dialog and choose "Configure naming and format". Leave the naming format alone, but you need to set the file output options. Here are the settings that I use:
If you plan on making further edits in Lightroom, I strongly suggest that you leave it set to 16bit and you have your Colour Profile set to ProPhoto RGB.
Once you have set these settings, when you want to save now all you have to do is click the "Quick Render" button and it will write the file back. (It will ask you if you want to overwrite first"
Some More Tips

Processing Multiple Files
There's one downside to this method and that is that it only works with one file at a time. If you want to work on multiple files, you'll have to do it a bit more manually, but there's a straight forward workflow for that too. I'll go into my method of batch processing files in more details later, but here's a quick overview of what I do
- In Lightroom I rate all the files I want to edit in Photo Ninja with 5 Stars
- I save out the metadata by selecting the files and pressing Command +S (or "Save metadata to file" in the Metadata menu)
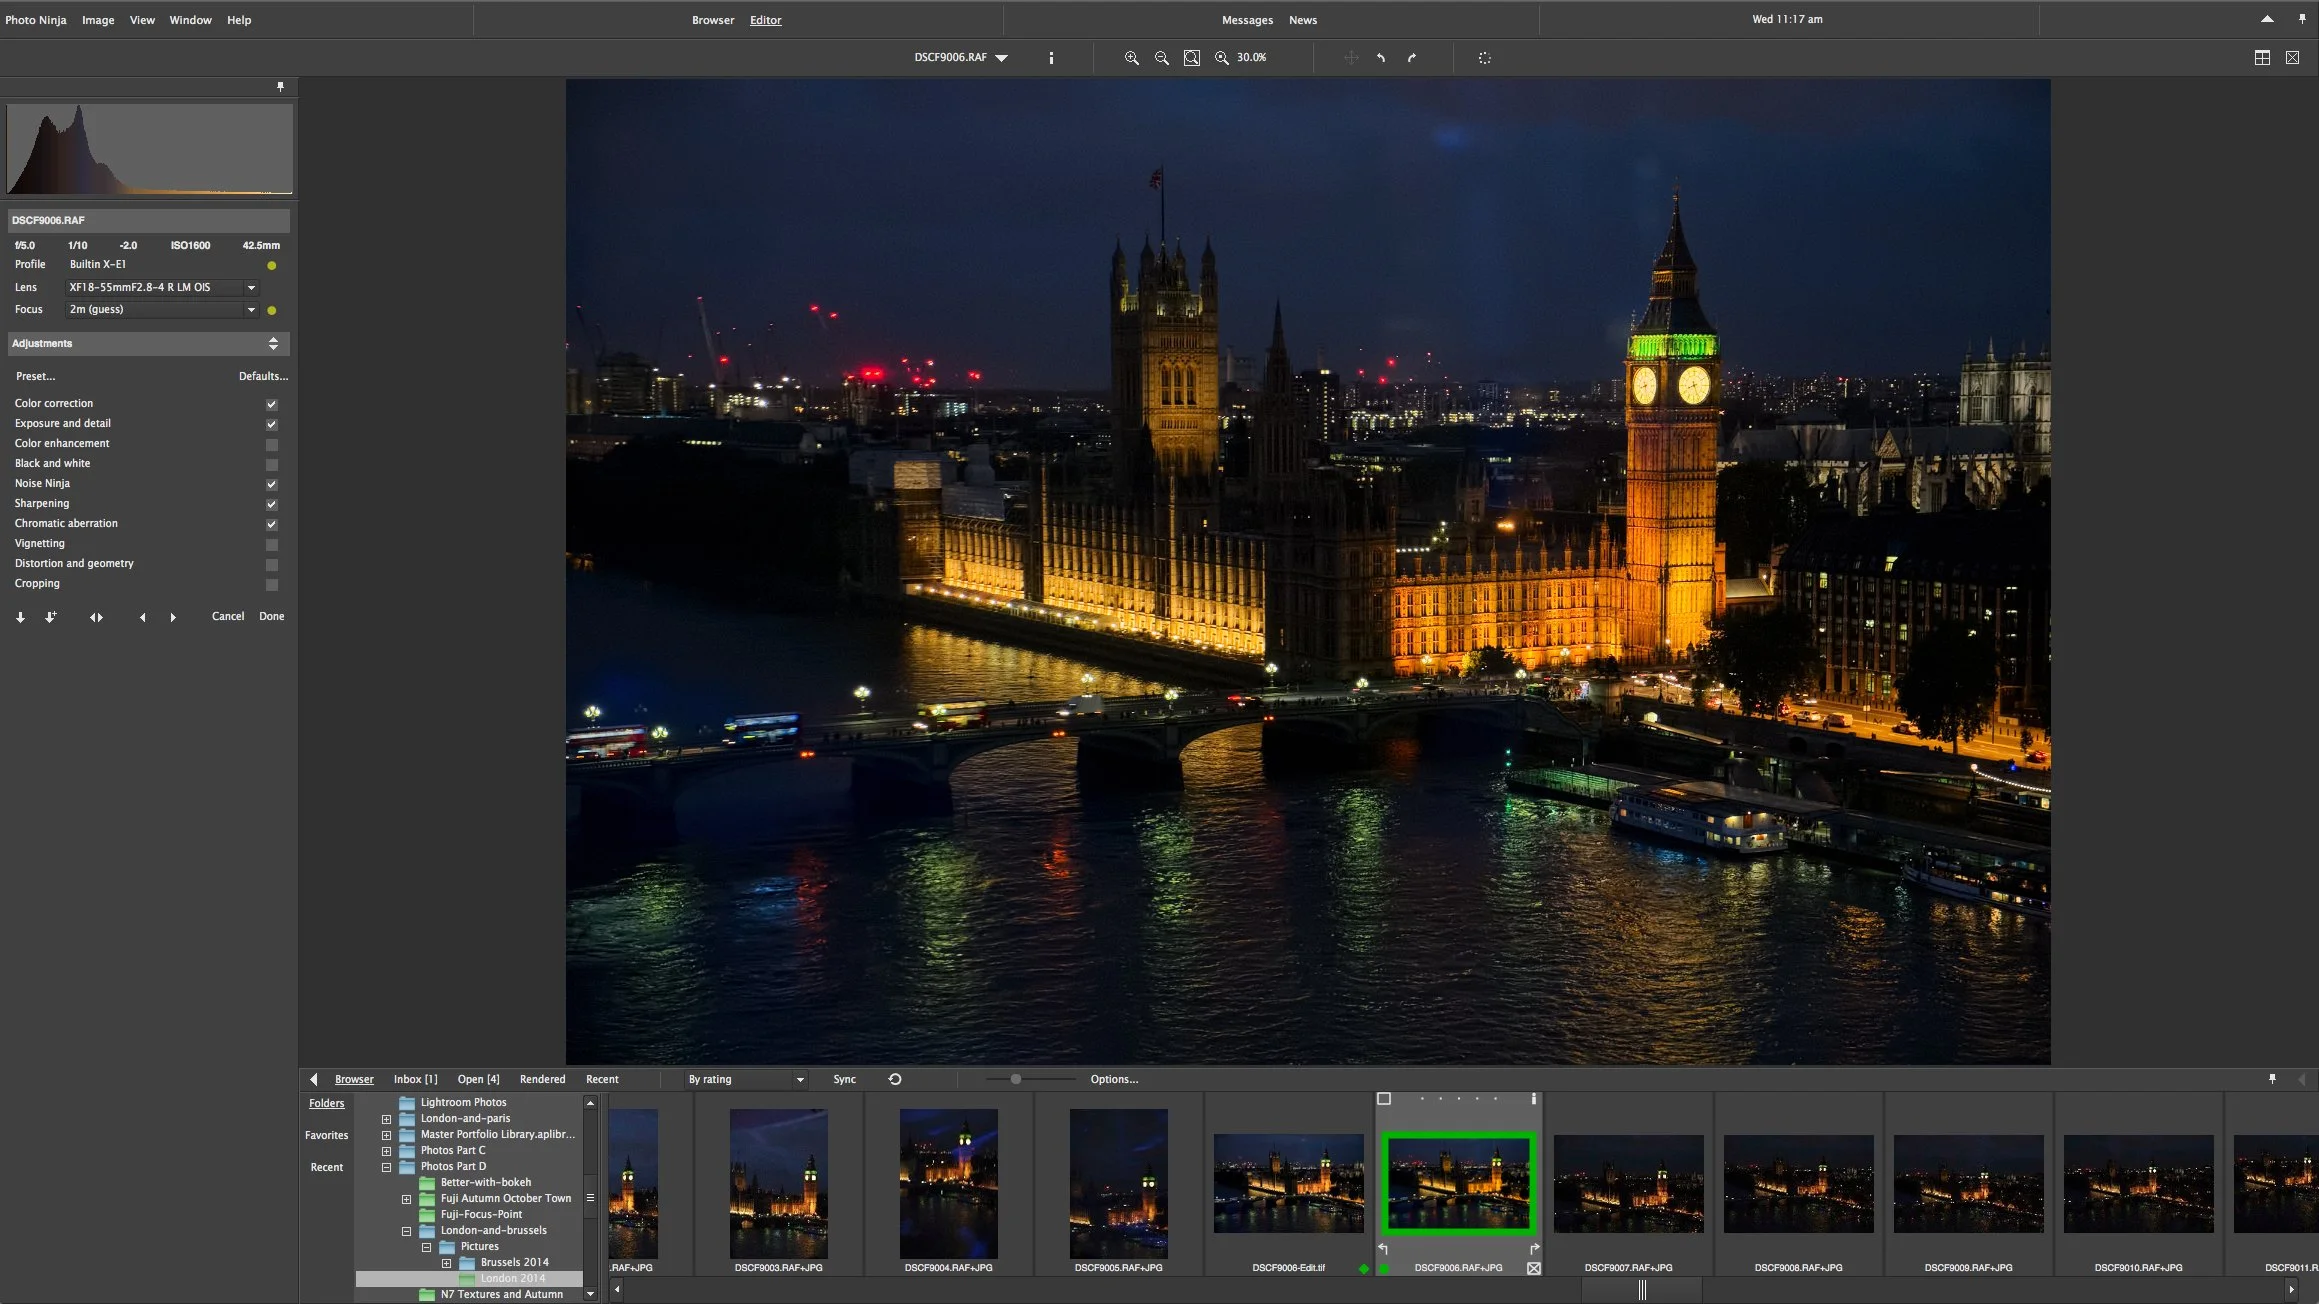
- In Photo Ninja I open the folder containing the raw files, and view by rating. This way I can see the files that I've rated for editing.
- I edit the files and then save them back to either the same folder, or a sub folder
- Back in Lightroom, I right click on the folder containing my images and choose "Synchronise Folder" from the pop-up menu. This will import the newly edited and processed images from Photo Ninja.
Additional Processing in Lightroom and using Presets
If you want to do some additional processing back in Lightroom, such as using VSCO presets (or some of my excellent presets ;-) #shamelessplug ) then there are a few things you need to take into account. You should try and not add too much contrast in Photo Ninja as most presets will add further contrast. Also, many presets include sharpening by default, but because you've already sharpened the files in PhotoNinja you don't need to re-sharpen them, so make sure to keep an eye on the sharpening settings, and if any preset applies sharpening you need to set it back to zero.
My Sharpening Settings for Fuji Files in Photo Ninja
Lots of you have asked me for the sharpening that I use in Photo Ninja, so here they are:
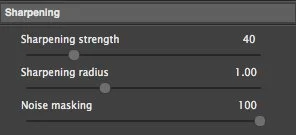
I generally try and keep Sharpening Strength as low as possible. Usually between 40 - 60
I prefer a radius of 1.0 over the default as I find it more filmic, but if you have very fine detail that you're trying to bring out, then a lower setting may work better
I always leave noise masking at 100.
One other setting to be aware of is the "Detail" slider in the Exposure and Detail adjustment group. I try and keep this below 10 as anything over that starts to look too artificial and introduces too much noise.
Speaking of noise, for images which may be a bit noisy, I turn on Luminance smoothing in the Noise Ninja group, but keep the setting down, usually around 10.
Conclusion
There's a lot to take in in this post, but I hope this information has been useful. Many of the settings I've suggested are personal preferences, and so take with a grain of salt, and try experimenting to find what works for you.
Please Help Support the Blog
I am a fine art Photographer and do not shoot commercial projects. I do my best to keep this site regularly updated with lots of tips, reviews, news and photography advice, all for free. If you like what you read here and want more, then sign up for our newsletter to get regular site updates and occasional special offers. You can also follow my photographic exploits on Facebook and Twitter
If you're a Lightroom user check out my original Lightroom Presets